Video Series: Here’s a Fresh Take on Addressing Anterior Pelvic Tilt

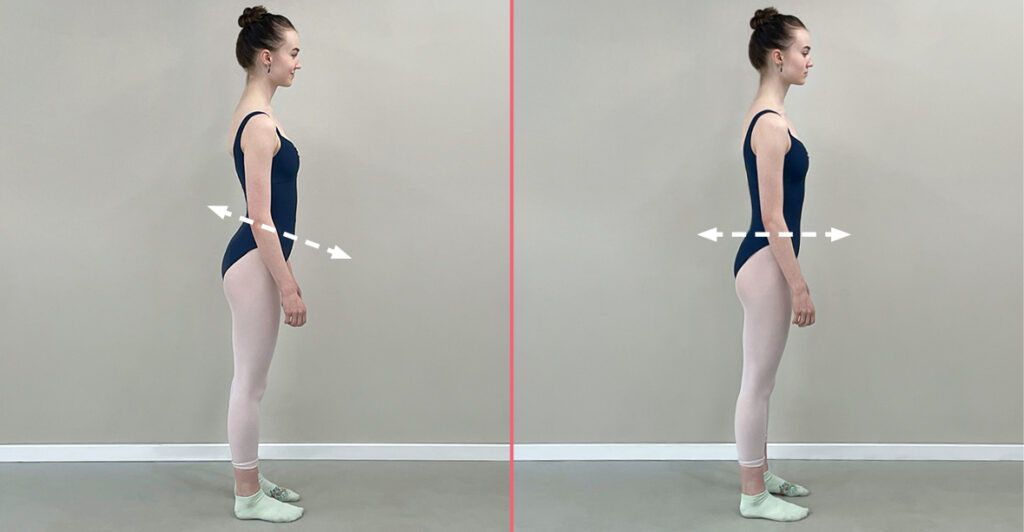
Have you heard the cue “lengthen your tailbone” in ballet class? If so, you may be in an anterior pelvic tilt (APT), meaning your front hip bones tilt down toward the floor, while your tailbone tilts up. Beyond affecting your appearance, being in APT compresses joints in your pelvis and spine. This limits your range of motion and pulls tension into the surrounding muscles. While APT it isn’t all “bad”—it can be very useful in creating momentum—managing your alignment may provide more control in your technique.
Teachers often give tailbone cues to encourage you to find a more neutral pelvis, but holding and maintaining those adjustments may make your dancing feel rigid. While these alignment shifts improve aesthetics and technique, they can come at the cost of momentum.
Respiration drills, like in the video series below, are innovative techniques that help stack your spine in a better way while increasing mobility. When performed well, they can save time in correcting posture, and with daily practice, the improved torso-over-hips relationship becomes habit. But first, let’s discuss three main components to focus on when using these drills to address APT: breathing technique, rib cage mobility, and proper foot motion.
Breathing Technique
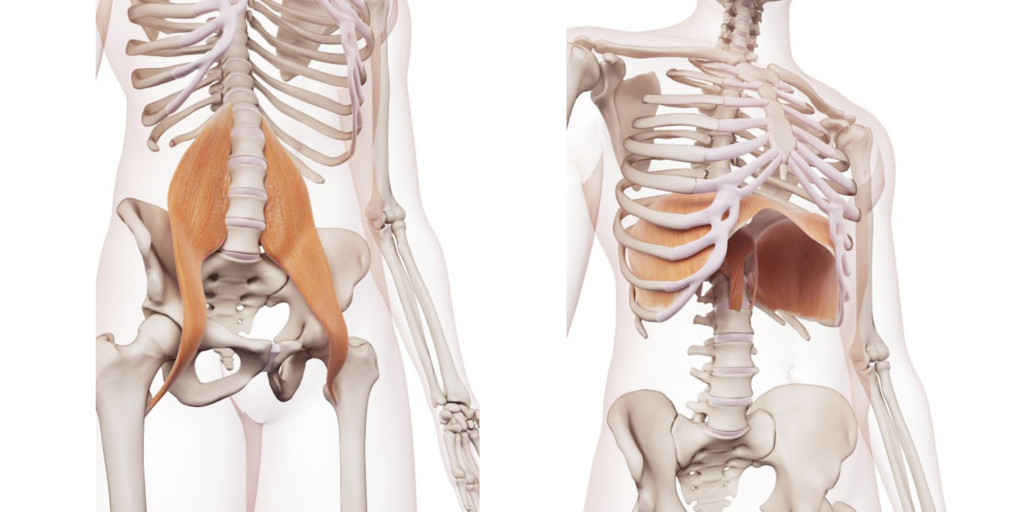
When you inhale, do your abdominals expand more than your chest? This breathing pattern, called belly breathing, can exaggerate APT. Belly breathing lengthens and subsequently tightens your psoas, a breathing muscle that connects your leg to your spine and weaves through the diaphragm (which also connects to your spine). When the belly pushes out, the hips shift forward, and the shoulders often shift back to stay balanced. This pressure on the belly creates tension in the lower back.
Rather than stretching your psoas in a runner’s lunge, which can actually replicate and exacerbate APT over time, low-key respiration drills can help decrease muscle tension through dynamic movement.
Rib Cage Mobility
Ideally, you should be able to stack your rib cage over your hips naturally. But when the ribs are stiff, many dancers resort to belly breathing or neck breathing, which can result in misalignments.
While belly breathing and overusing your rectus abdominis can shift your rib cage, neck breathing is a shallow breathing strategy that creates excess body tension. It often gets exaggerated as you’re trying to keep your torso stacked during difficult movements, like in adagio. (Think about it—how often do you hold your breath while lifting your leg in développé?) All of that muscle tension can decrease joint mobility, and sends your sympathetic nervous system towards a fight or flight response. Improving your rib cage expansion by focusing on gentle, sustained exhales can bring your nervous system down while decreasing tension throughout your body.
When your rib cage expands and contracts three-dimensionally, your body’s overall range of motion increases. And when your ribs and pelvis are well-stacked, your diaphragm, psoas, and spine gain movement through respiration. In fact, if you work on rib cage expansion, improvements can trickle down all the way to your feet and be significant enough that you’ll be more grounded in portions of class like adagio.
Proper Foot Motion
Our feet provide the brain with sensory information on how to manage gravity. Problems with the foot travel into the knees, hips, and shoulders, and vice versa.
Wobbly ankles during adagio and turns, during fondu, or when landing jumps are often a signal that bones within your foot and ankle joints aren’t moving well in relation to one another. When a stiff foot doesn’t melt into the floor in a fondu or jump, your hips often respond by tilting down to improve mobility.
To analyze your own feet, move one foot forward and lunge in parallel until your knee is nearly over your big toe. The more forward your weight, the more your arch should melt into the floor. For your foot to respond well to the weight of your body, your tibia needs to internally rotate. Otherwise, the arch searches for center, the knees cave in, and the hips often go into APT. Pressing the base of the big toe into the floor significantly helps shifts your hip alignment.
Respiration Drill Series
You can manage APT and train the brain into better alignment by following this respiration drill sequence. For best results, run this drill series twice daily for about 10 minutes.
You’ll need:
- sneakers
- yoga mat
- 3 yoga blocks
- large Pilates ball
- 2 foam wedges (optional)
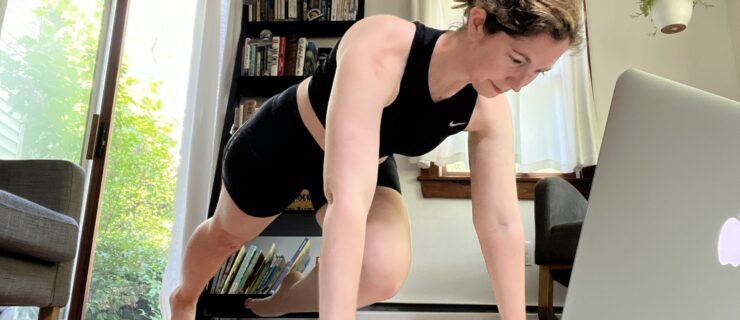
1. Foot Retraction
This preliminary exercise gets your arch moving and loosens your legs and hips.
- Time: 1–2 minutes per foot
- Tips: Be sure your hand is contacting your foot as instructed. It’s okay to add a little pressure.
- Common error: Not pressing the arch down while the heel goes back.
2. Five-Month Breathing
The Five-Month Breathing drill allows you to expand your rib cage front to back and find a neutral pelvis in a side-lying, non–weight-bearing position. Learning to identify a neutral pelvis lying down is necessary for your mind to adapt to the position standing up. It also creates a sense of safety for your brain, allowing your body to release tension.
- Reps: 4 sets of 5 breath cycles
- Tips: Stay relaxed, especially through your neck and shoulders. Stack your shoulders and head over your hips without holding tension.
3. Cross-Connect Turtle Roll
The Cross-Connect Turtle Roll helps with rib-cage expansion and opens up space in the hips.
- Reps: 4 sets of 5 breath cycles. Take a 20-second rest between sets.
- Tips: Keep your chest and neck relaxed and your sternum lifted. Kick on the exhale to come up. Don’t brace; you are pushing synovial fluid across your joints and need your spine to be somewhat pliable as you hit the floor.
4. Wall Squat
This drill loosens up the hips and uses the feet to help manage posture.
- Reps: 4 sets of 5 breath cycles. Take a 20-second rest between.
- Tips: Stay heavy in your heels and keep your knees behind your ankles as you lower. Breathe slowly and relax your neck and shoulders. Watch that your abdominals are not the main mover on the inhale—your front line should expand without the spine shifting alignment.
5. Hook-Lying Bridge
This last drill in the series offers mild activation of the hamstrings to help bring your pelvis into a neutral position.
- Reps: 4 sets of 5 breath cycles
- Tips: Get heavy in the heels on your exhale. You can add a very small amount of pressure to your foot contacts as you breathe out, but stay relaxed.